Wednesday, July 18, 2012
Shifting Directions
I have three blogs. I started with one and it just grew from there. I dunno...seemed like a good idea at the time. Anyway, it has become apparent to me that I spend most of my blogging time posting on one of the three blogs, The Creative Diva. The other two, Nature's Conversation, dedicated to my gardening and Gitana's Corner, which contained musings and anecdotes of my everyday life, have fallen by the wayside. They have become embarrassing reminders that I just can't keep up the pace necessary to maintain all three. So I had a brilliant idea -- why not roll everything into one? After all, life is a creative process so everything I do in my life is creative in one way or another, isn't it? Of course it is! Otherwise how else could I call myself The Creative Diva? So it's settled. As of today I will no longer be posting in three different blogs and compartmentalizing my life. Today I unify all the various aspects of my wonderful, interesting and above all creative life in one blog -- The Creative Diva. This should help me simplify my life, stay on track and provide relevant content in a more timely manner. At least that's the plan.
A big thank you to my readers who have stuck with me through all my ramblings and lapses in posting. I'll try to do better from now on. Stay tuned.
Ballo ergo sum,
- Gitana, the Creative Diva


Saturday, July 14, 2012
Summer Decorating Begins
(Click on any photo to see a larger image.)

 I had promised the director at the Dorchester Senior Citizen Center that I would come back every few months to do the seasonal decorating. I was past due on decorating for summer because the month of June was incredibly busy for me but I finally went to the center to start livening up the space for the hot summer months.
 Fortunately I had done a pretty good job of decorating for spring because summer's decorations were added to the already festive look of the room. The walls were already decked out with dozens of butterflies and flowers. To that, I added some kites, colorful flip-flop sandals and two large and very colorful pennants (first photo) that the center director had purchased, all familiar symbols of summer. Coincidentally I had created my own Summertime pennant (second photo) to replace the Spring sign that I had created and hung in the center several months ago. Even though I had no prior knowledge of the pennants the center director had bought, the colors and the motif of my pennant were a perfect match for it and the rest of the room. I couldn't have planned it better. The kites were pinned to several large decorative fabric panels that I had scored for the center last year through a Freecycle donation. You can see some of these panels in the last two photos. In the last photo you can also see those colorful flip-flops strung from a heating pipe, looking for all the world like those sneakers you see hanging from utility lines all over the city. The sandals hang about 8 feet above the floor, low enough for everyone to easily see them but high enough to prevent any of the light-fingered members from making off with them. (Oh yes, those seniors will steal anything that isn't nailed down.) What you don't see in these photos is the Summer Goddess that I showcased in my last post. She was safely on view in a locked glass display case.


 I had promised the director at the Dorchester Senior Citizen Center that I would come back every few months to do the seasonal decorating. I was past due on decorating for summer because the month of June was incredibly busy for me but I finally went to the center to start livening up the space for the hot summer months.
 Fortunately I had done a pretty good job of decorating for spring because summer's decorations were added to the already festive look of the room. The walls were already decked out with dozens of butterflies and flowers. To that, I added some kites, colorful flip-flop sandals and two large and very colorful pennants (first photo) that the center director had purchased, all familiar symbols of summer. Coincidentally I had created my own Summertime pennant (second photo) to replace the Spring sign that I had created and hung in the center several months ago. Even though I had no prior knowledge of the pennants the center director had bought, the colors and the motif of my pennant were a perfect match for it and the rest of the room. I couldn't have planned it better. The kites were pinned to several large decorative fabric panels that I had scored for the center last year through a Freecycle donation. You can see some of these panels in the last two photos. In the last photo you can also see those colorful flip-flops strung from a heating pipe, looking for all the world like those sneakers you see hanging from utility lines all over the city. The sandals hang about 8 feet above the floor, low enough for everyone to easily see them but high enough to prevent any of the light-fingered members from making off with them. (Oh yes, those seniors will steal anything that isn't nailed down.) What you don't see in these photos is the Summer Goddess that I showcased in my last post. She was safely on view in a locked glass display case.
I'll go back to the center to finish the summer decorating and then I'll disappear again until September when it will be time to take down all the spring/summer decorations and switch over to fall. On the heels of fall decorating comes winter holiday decorating and that is a huge job. Until then I'll be in my garden, watering and weeding, planting and picking.
Ballo ergo sum
- Gitana, the Creative Diva
Ballo ergo sum
- Gitana, the Creative Diva
Thursday, July 12, 2012
The Goddess of Summer
 Life has been charging at me full tilt and I haven't had the opportunity to do much creative playing since I participated in my last OSA Card Layout Challenge so I haven't really had much to post. When I'm not invested in some family-oriented event, I'm in the garden for hours at a time watering, weeding, moving, planting, watering some more. By the time I make it down to my crafts workshop, it's all I can do to check my email and crawl into bed.
If you've been following me for any length of time, you'll know that I left my volunteer teaching position at the Dorchester Senior Citizens Center some months ago but I promised them that I would return to do the seasonal decorating that the members love so much. I had hoped to make it over there in June but the events of my life did not permit it so I'm heading over there later today to start decorating for summer. Yeah, I know, summer's been here for a month but better late than never, I say. I had taken a foam wig head from the senior center with the intention of decorating it for a seasonal display and after months of stops and starts I have finally finished it.
 |
| Close up of flower, butterfly and hummingbird details. |


One a slightly different note, I did manage to squeeze in a small project to commemorate my son Alex's graduation in June. His cap and gown were silver and his tassel was black so I created a box that looked like the mortarboard he wore at graduation. On the top I wrote out a message with stick-on letters and on the front of the cap I placed his school initials and class year. For the gift inside the box I folded a series of bills origami style to resemble hearts.This marks the last of my children's graduations for a while and I couldn't be happier.
Okay, enough of this. I've got to get back to my garden.
Ballo ergo sum
- Gitana, the Creative Diva
Monday, June 4, 2012
OSA Layout Challenge Cards
(Click on a photo to view a larger image.)


 In spite of the grueling schedule I have had to keep at work this past week, I managed to eke out time to craft some cards for the weekly Oriental Stamp Arts challenges. I consider it art therapy to battle work-related stress.
For the card on the left, OSA Challenge #173, our challenge was to create a window card according to the layout provided. This is a card with an aperture cut out to reveal part of the inner card design. For my card I chose fans and gingko leaves. They are a natural pair inasmuch as they have the same general shape. I stenciled the gingko leaves on the outer card layer using a 6" x 6" template from The Crafter's Workshop. The fans stamped on the inside of the card were colored with Prismacolor art pencils and highlighted with glittery gel pens. The fans were then masked and sponged with ink to create the soft green shading all around them.
 For OSA Challenge #174, we were asked to make a card using a printed napkin as part of the decorative elements of the card. I decided to give myself a double challenge by also creating a card in a out-of-the-ordinary format. Because I enjoyed creating the twisted easel card for my daughter's graduation so much, I decided to use that format again. I am very happy with the way this card turned out and apparently the moderator for the OSA weekly challenges liked it enough to make the twisted easel format the subject of OSA Challenge #175.
I chose a circular rice paper napkin with a beautiful blue floral border for my card, spray glued it to a piece of white card stock, cut it into quarters and trimmed close to the edge of the image. A piece of gold-dotted handmade paper was layered onto the top of the card and a quarter of the napkin glued on top of it, trimming it as necessary to create the look as seen in the photo to the left. My biggest challenge was trying to get the flowers on the inside of the card to form a continuous semicircular image. I ended up cutting out and individually placing flowers for optimal results. I managed to use to rosebuds from the image as the stops for the upper 'easel' panel by placing foam squares behind them. The kanji symbol for summer on the upper panel is echoed by its English translation on the lower panel. Strategically placed gold Asian motif stickers, as well as some tiny golden dragonflies, coordinate well with the gold dotted background.
The beautiful butterfly is cut with coordinating Memory Box dies, one for the upper veins and another for the lower body. The body was cut from blue card stock and colored with pigment inks and gel pens. When I first got these dies, I loved them so much I cut and colored a bunch of butterflies just for the love of it so all I had to do was reach into my RTU (ready to use) stash and pick one out for this card.
Ballo ergo sum
- Gitana, the Creative Diva


 In spite of the grueling schedule I have had to keep at work this past week, I managed to eke out time to craft some cards for the weekly Oriental Stamp Arts challenges. I consider it art therapy to battle work-related stress.
For the card on the left, OSA Challenge #173, our challenge was to create a window card according to the layout provided. This is a card with an aperture cut out to reveal part of the inner card design. For my card I chose fans and gingko leaves. They are a natural pair inasmuch as they have the same general shape. I stenciled the gingko leaves on the outer card layer using a 6" x 6" template from The Crafter's Workshop. The fans stamped on the inside of the card were colored with Prismacolor art pencils and highlighted with glittery gel pens. The fans were then masked and sponged with ink to create the soft green shading all around them.
 For OSA Challenge #174, we were asked to make a card using a printed napkin as part of the decorative elements of the card. I decided to give myself a double challenge by also creating a card in a out-of-the-ordinary format. Because I enjoyed creating the twisted easel card for my daughter's graduation so much, I decided to use that format again. I am very happy with the way this card turned out and apparently the moderator for the OSA weekly challenges liked it enough to make the twisted easel format the subject of OSA Challenge #175.
I chose a circular rice paper napkin with a beautiful blue floral border for my card, spray glued it to a piece of white card stock, cut it into quarters and trimmed close to the edge of the image. A piece of gold-dotted handmade paper was layered onto the top of the card and a quarter of the napkin glued on top of it, trimming it as necessary to create the look as seen in the photo to the left. My biggest challenge was trying to get the flowers on the inside of the card to form a continuous semicircular image. I ended up cutting out and individually placing flowers for optimal results. I managed to use to rosebuds from the image as the stops for the upper 'easel' panel by placing foam squares behind them. The kanji symbol for summer on the upper panel is echoed by its English translation on the lower panel. Strategically placed gold Asian motif stickers, as well as some tiny golden dragonflies, coordinate well with the gold dotted background.
The beautiful butterfly is cut with coordinating Memory Box dies, one for the upper veins and another for the lower body. The body was cut from blue card stock and colored with pigment inks and gel pens. When I first got these dies, I loved them so much I cut and colored a bunch of butterflies just for the love of it so all I had to do was reach into my RTU (ready to use) stash and pick one out for this card.
Ballo ergo sum
- Gitana, the Creative Diva
Monday, May 21, 2012
Staying on the Good Foot
I've been trying hard to keep up with the weekly Card Layout Challenges sponsored by the Oriental Stamp Arts Yahoo Group I belong to but the demands of my job are leaving me with little time and energy for fun things like crafting. I did manage to complete challenges #171 (top) and #172 (bottom). As always, my style is simple and clean. With images that represent the Asian cultures I believe this is the best approach. I love the simple elegance of Asian motifs so I tend to keep the elements somewhat spare to allow the natural beauty to be seen.
 |
| OSA Challenge #17 |
 |
| OSA Challenge #172 |
For the layout in Challenge #172, I turned it on its side and used it in a portrait orientation instead of the original landscape orientation. Again the use of colors is minimal -- black, creamy white and a vintage beige. The background is a piece of pattern paper that looks like an old Chinese newspaper. The layout required a panel with a verse or sentiment and an embellishment that was anything BUT paper. I chose narrow satin ribbons in black and creamy white and knotted them together in a simple yet interesting way to really play up the contrast of the ribbons against the background and against each other. The kanji symbols in the text box are actually three small stamps that I placed side by side, held together tightly and stamped them all at the same time. I sponged Distress Ink (color - Old paper) which perfectly matched the look of the background around the edges of the white panel and also around the background panel for a subtle effect. The wispy little branch stamp was embossed with superfine embossing powder to make the color really vibrant and contrast strongly against the patterned background. In spite of the strong contrasts, nothing in this layout is overpowering. Everything seems to be working together in perfect balance and harmony.
Ballo ergo sum
- Gitana, the Creative Diva
Tuesday, May 8, 2012
All Grown Up


(Click on any photo to see a larger image.)
(Click HERE to see more pictures on Photobucket.)
My beautiful youngest daughter Angel graduated from Cape Fear Community College this past weekend with an associates degree in science. Her goal is to become a marine biologist and to further that goal she is applying to the Coast Guard. She plans on serving in the Guard while getting on-the-job training in areas of her specialization and, when her term is up, returning to finish up her higher education with the tuition benefits offered by the military. Such an ambitious and intelligent individual deserves a card as special as she is so I created this Twisted Easel Graduation Card based on a tutorial by Lyn Bernatovich on Paper Craft Planet . The link for this great project came in my email just at the nick of time because I was stumped as to what I was going to make for my daughter. Lyn's tutorial made it easy and was a great inspiration for my own creativity.
As you can see, I matched the color of the card to the color of the graduation gown. The tassel color is different because my daughter is a member of Phi Theta Kappa honor society and is given the honor of wearing not only a gold tassel but a blue and gold honor cord around her neck. Oh well, she doesn't mind that little detail being a bit off. At least I had gold stars on her card to capture her honor color.
Next month my son also graduates from community college. The challenge now is what card am I going to create for him.
Ballo ergo sum
- Gitana, the Creative Diva
Friday, April 27, 2012
Getting Back Into The Swing Of Things


(Click on any photo to view a large image.)
My two year stint as the arts and crafts instructor at the Dorchester Senior Citizens' Center was a wonderful experience. Working with and getting to know those seniors was truly inspirational as well as educational. I learned much about the process of conceiving, creating and implementing a crafting session but I think I learned even more from the seniors themselves. This period was an investment of time and effort that rewarded me over and over again. I have been blessed me with many new friends and it is a time I will never forget.
There was one downside to this experience. The time and energy I expended on the senior crafting projects meant there was less time for me to create for myself and engage in the artistic comradeship I enjoyed with my fellow members of the Oriental Stamp Art Yahoo Group. Participating in swaps and weekly challenges was something I had truly enjoyed and sorely missed. Now that I am no longer crafting for the senior center, I have more time to spend in those pursuits that I enjoy and so I have stuck a creative toe back in the water and have begun participating in the weekly challenges again. So far I have done two challenges (see photos) and already I can feel that familiar feeling of creative electricity coursing through me. I am looking forward to participating in some swaps in the future and continuing my artistic journey to wherever it may take me.
Ballo ergo sum
- Gitana, the Creative Diva
Monday, April 16, 2012
Creative Detritus


(Click on any photo to see a large image.)
 An artist's work area is not neat. To be so would be antithetical to the creative process. At least this is what I tell myself whenever I look at the sometimes unbelievable mess on and around the craft table in my basement workshop. "It's only temporary", I convince myself, "until this project is completed", but I know this is not true. It's not true because there's ALWAYS another project in the pipeline. More often than not there are several projects in various stages of completion on my table simultaneously along with bits and pieces leftover from completed projects that I just never got around to removing. This photo is evidence of that very thing. On the table you see four cards being laid out on a piece of cardstock. There is a foam wig stand that is in the process of being altered for a display and to the right of that there are four ATC's (artist trading cards) being held aloft by a doohickey (that's a technical term) with alligator clips at the end of it's arms looking for all the world like a very small Transformer. The cards and ATC's were in the process of being framed for submission to the Local 3 Biennial Spring Arts Festival, a show I entered when it last ran two years ago. (Click here to read the results of that show.) Because I had been so busy for the past two years volunteering at the senior citizens center, I really hadn't had time to do much work of my own so I initially had not considered entering the show. My husband convinced me to enter something just for the hell of it so I decided to frame these two series of pieces. I had to improvise creating new mats over the ones that came with the frames because they were designed for standard size photos, not for this kind of work. I placed pale green handmade paper with flower inclusions behind the underwater scenes and placed the "Night Flight" series on a rust colored handmade paper mat laid over the white mat in the frame. The white mat was stamped with watermarking ink and dusted with gold PearlEx to create a subtle pattern that worked very well overall.
So now that these cards are framed and ready to be submitted I should, in theory, have more free space on my tabletop, right?
Not a chance.
Ballo ergo sum
- Gitana, the Creative Diva
Monday, March 26, 2012
The Arrival of Spring
(Click on any photo to see a larger image.)
 Due to an unexpectedly warm winter, here in the northeast we are experiencing an unusually early spring. With temperatures at times reaching upwards of 70 degrees Fahrenheit, all manner of flora and fauna that would usually be out of sight until April has made a glorious appearance in mid-March as evidenced by the beautiful daffodils I photographed in my garden. There was actually a period during which daffodil shoots were actively growing with nary a crocus in sight when the reverse is usually the case. Eventually the crocuses got their act together and showed their faces before the arrival of the daffodils but it was a pretty tight race.
 Although I announced in a previous post that I would no longer be conducting weekly craft classes at the senior citizens center, I agreed to continue putting up the seasonal decorations. I wanted to really celebrate the arrival of spring's colorful flowers in a way that all the members could enjoy so I created a large (12" x 34") sign to go over the entry door to the main activity/lunchroom, a place where it can't be missed by anyone who enters the center. All the materials used to create this sign were either free or donated, including the electronic cutter I used to cut out the various elements of the sign. The paper and fabric flowers came from Materials for the Arts and the cutting files came from SVGCuts.com, a site that offers free cut files for electronic cutting machines. The butterflies were created with Memory Box dies I purchased for my personal use but once I cut and colored them, they were so beautiful I just couldn't keep them all to myself. Click on the photo and zoom in to see the details on those blue beauties. There is also an invisible detail that doesn't show up in the photo. The oval in the center of the sign has flowers stamped in watermarking (transparent) ink and dusted with gold pigment powder. The stamped flowers can't be seen until you pass underneath the sign. When the light catches it just the right way all the flowers appear to shine.
This is the first large scale project I've done with my eCraft and I still have much to learn but I'm very pleased with the way this first attempt came out. Ya know, I had so much fun making this sign, perhaps I'll make another one for summer.
Ballo ergo sum
- Gitana, the Creative Diva

 Although I announced in a previous post that I would no longer be conducting weekly craft classes at the senior citizens center, I agreed to continue putting up the seasonal decorations. I wanted to really celebrate the arrival of spring's colorful flowers in a way that all the members could enjoy so I created a large (12" x 34") sign to go over the entry door to the main activity/lunchroom, a place where it can't be missed by anyone who enters the center. All the materials used to create this sign were either free or donated, including the electronic cutter I used to cut out the various elements of the sign. The paper and fabric flowers came from Materials for the Arts and the cutting files came from SVGCuts.com, a site that offers free cut files for electronic cutting machines. The butterflies were created with Memory Box dies I purchased for my personal use but once I cut and colored them, they were so beautiful I just couldn't keep them all to myself. Click on the photo and zoom in to see the details on those blue beauties. There is also an invisible detail that doesn't show up in the photo. The oval in the center of the sign has flowers stamped in watermarking (transparent) ink and dusted with gold pigment powder. The stamped flowers can't be seen until you pass underneath the sign. When the light catches it just the right way all the flowers appear to shine.
This is the first large scale project I've done with my eCraft and I still have much to learn but I'm very pleased with the way this first attempt came out. Ya know, I had so much fun making this sign, perhaps I'll make another one for summer.
Ballo ergo sum
- Gitana, the Creative Diva
Friday, March 16, 2012
Caught in a Crafty 'Net
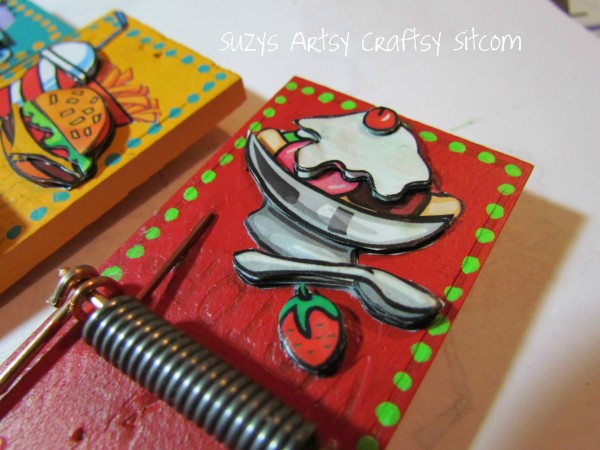 |
| Magnetic Mousetrap Clips |
From time to time I'll be featuring noteworthy craft sites on my blog in order to spread the artistic wealth around. I hope you like them as much as I do.
Ballo ergo sum
- Gitana, the Creative Diva
Subscribe to:
Posts (Atom)