Wednesday, January 29, 2014

Throwback to the Holidays

(Click on any photo to view a larger image.)
Gift for grandson #1
Gift for grandson #2
Dancing at our community association
holiday gathering


It's only the end of January, just one month after the December holiday festivities, but it feels as if they took place eons ago, having been buried under several feet of snow. During this frigid, unforgiving time, I want to look back to some of the benchmarks of my annual holiday traditions like coquito, bread pudding, wrapping presents and decorating the house. Here are a few snapshots of my holiday celebrations.

Bread pudding in the making
Coquito - traditional Puerto Rican
holiday drink
My Coast Guard daughter and her beau.
 All the decorations have been packed away and the good food  has been eaten. Now I can look forward to longer, warmer days and the promise of gardening come spring. Goodbye, holidays. Until next year.

Decorations dragged down from the attic.
Rocking the new scarf my
sister gave me.

Ballo ergo sum
- Gitana, the Creative Diva

Thursday, November 14, 2013

The Last Hurrah

The soft coolness of early fall has given way to the bitter chill of impending winter. Weather reports forecast temperatures dipping below the freezing mark and warned of possible overnight frost. That was the push I needed to evacuate my garden of the last of its crops and to finally see what was going on underground.

I had planted some sweet potatoes pieces that had sprouted in my cabinet because I left them in there too long and didn't eat them in time. Two years ago I had done the same thing with a piece a friend of mine was about to throw out. With my first attempt I was so excited and impatient to see the roots, I dug them up before they had fully matured. I didn't know I was supposed to allow the leaves to die back before harvesting them. This time I resolved to be patient and give the plants the time they needed to fully develop and I was rewarded with the roots you see above surrounded by the green tomatoes that were still growing on the vines. In all, I picked over three pounds of tomatoes and dug up nearly four pounds of sweet potatoes. The large one in the center of the photo weighed over a pound all by itself. Not bad for a vegetable garden that appeared to be nearly lifeless.

I haven't decided what to do with the roots yet. I'm toying with the idea of sweet potato pie, mashed sweet potatoes, sweet potato fries or sweet potato chips. Then again I may do nothing, preferring to hand them over to my mother or sister to prepare for the Thanksgiving feast. It would be the first Thanksgiving that I am able to contribute something from the garden that everyone can partake of. I expect that several of the tomatoes will be ripe by then as well and I'll be able to make a salad for the holiday feast. Some that I had picked green a couple of weeks ago finally ripened to a beautiful red this week and went into my dinner salad so some of these greenies should be ready by the end of the month.

It's moments like this that make all the hard work of gardening worthwhile.


Ballo ergo sum
- Gitana, the Creative Diva

Thursday, October 10, 2013

Harvest Time

This is the time of year my husband risks life and limb to harvest the apples in our tree. This is no small feat when you consider my tree, which I purchased believing it to be a dwarf variety, is over 25 feet high. We didn't harvest as many apples as we usually do but there were enough for me to make two apple pies and a couple quarts of fresh apple juice. This year I have a masticating juicer that I have been putting through its paces and it hasn't disappointed me yet. In addition to apples, I've juiced pineapples, carrots and pears. It is my intention to move as far away from processed foods as possible and the juicer is one step in that direction.


Another step towards healthier eating is my dehydrator. Dehydrating isn't something I know very much about but I decided to give it a go for the first time last week using some freshly picked basil. I learned a couple of things pretty fast. One: dehydrating takes a lot longer than you expect; two: dehydrating takes A LOT LONGER than you expect. Because I didn't have a dehydration guide, I had no idea how long it would take to dry my basil. Three batches later I can confidently say that it takes 18 hours...yes, that's right...18 hours to dry basil. This doesn't count the initial washing and drying of the wet leaves before placing them in the machine.

Speaking of that, there was no way I was going to be hand drying several hundred basil leaves by hand with paper towels so I decided to speed up the process by placing them on a sweater rack and putting the leaves in my clothes dryer on air dry (no heat). Worked like a charm. Word to the wise: basil is at its best when picked BEFORE they bloom. That's when the leaves contain the most oil and are the most aromatic. My first batch came from post-bloom plants and the results were not nearly as aromatic as my final batch which came from plants with no flowers on them. My son had suggested I try dehydrating bananas to make banana chips which I think is a great idea but I can only imagine how many days it will take to adequately dry a high moisture fruit like banana.

Hmmm, juicer, dehydrator, vacuum sealer (got that too!)...now if I could only find room for a pressure canner...

Ballo ergo sum
- Gitana, the Creative Diva

Wednesday, October 9, 2013

Glorious, Glorious

A bee samples a golden marigold.
Petunias in their final curtain call.
Basil (foreground) and marigolds.
Glorious morning glories.
Today was a very gray day in Brooklyn, comfortably cool but gray. Although it didn't rain, the overhead clouds cast a sad pallor over everything. Luckily I have a cure for the gray day blues waiting right outside my front door. It brings a smile to my face and greets everyone who passes with brightness and joy. Of course I'm talking about my garden. Although autumn is leaving its mark on her, she fights back with beauty and bounty. Here, take a look. Isn't she pretty?
Hanging plants on my porch.
Snapdragons
Asters and Alyssum


Ballo ergo sum
- Gitana, the Creative Diva

Friday, October 4, 2013

Harvest Time

Coleus
I've gushed on and on about my garden enough times for anyone reading this blog to know I really love it. The feeling of growing, picking and eating my own food is unrivaled. Add to that the beauty of the abundant flowers I also grow -- well, it doesn't get any better than that for me. Rather than gush any further, I'll just post a few photos of my little slice of heaven on earth. These pictures were taken within the last few weeks so it's a good representation of what my garden looks like now. Autumn is upon us and summer's bounty is waning but until frost kills off the last of my greenery I'm going to enjoy it to the max. Then I'll put all my pots and shovels away and spend the winter planning next year's garden.

Nope. It doesn't get any better than this.

Morning glories on my fence.
Bi-color corn. It was good!
Petunias in one last burst of blooms.

My garden goodies.
Jalapenos, a pepper and 12 inch cucumbers .
Dwarf apple tree.


Marigolds -- lots of them!

Ballo ergo sum
- Gitana, the Creative Diva

Friday, August 30, 2013

Winged Bling

Butterfly Bling - Variations on a theme
In my continuing quest to work my creative mojo, (see last post here), as well as to use up some of my expansive stash of supplies, I have decided to use the some of my RTU's (go here or here or here to see previous posts explaining this). In this case it began with a piece of sprayed watercolor background that I had left over from a previous project. To that I added some ribbon, a little rubber stamping and some bling to make it shine and I loved the result. Not content with just one card, I decided to create four more in different colorways.

The butterfly stamp, from one of the very first stamp sets I bought when I began card making more than six years ago, was stamped with VersaMark watermarking ink on a piece of white cardstock with a satin gloss to it. I then colored the image with either shimmery chalks, PearlEx pigment paint powders or a combination of the two. The backgrounds were created by spraying Stamp Zia's liquid watercolor paints on a piece of watercolor paper, drying between colors with a craft dryer (a blow dryer works fine, too.) The base card was specifically chosen to coordinate with the watercolor background. The flourishes, stamped with Inkadinkado Gem Stone Flourishes clear acrylic stamp set (#98977), were inked in a coordinating color and studded with self adhesive rhinestones that picked up some of the colors in the background.

To see photos of the individual cards,as well as the rest of my work, go to my Photobucket album here. Thanks for reading. Comments especially welcome.


Ballo ergo sum
- Gitana, the Creative Diva

Tuesday, August 20, 2013

Reclaiming My Mojo

I can not believe it has been nearly six weeks since my last post and the summer is nearly gone. Time does not fly. On a slow day it careens past us at breakneck speed . At other times it moves so quickly it can not be seen by the naked eye. And yet it happens every day. That must explain why I look in the mirror and don't recognize the woman who looks like my mother and wonder what happened to the real me.

In the meantime I've been very busy with my garden, which always brings me great joy, and I've been trying to get back into a crafting groove. To that end I have been creating cards as well as some little embellishments. One of the recurring motifs of this summer has been the dragonfly. I have never seen so many dragonflies in my garden as I have seen this year. They are unsurpassed in number and size as evidenced by the photo of a huge dragonfly that visited me last month (Beautiful colors on the body, don't you think?). I love the look of dragonflies and in the past have purchased rubber stamps and embellishments of dragonflies to use in my crafting. This time I thought I would try my hand and creating my own little dragonflies embellishments. Using a paper punch, I punch out several dragonflies from acetate and colored the wings with Stazon solvent ink. I punched out more dragonflies from card stock, cut off the wings and colored details onto the bodies with gel pens. Then I glued the paper bodies onto the acetate dragonflies and bent the wings up at a slight angle. Voila! Little dragonflies that measure only one inch square.


I also created a card for an upcoming challenge card swap with Oriental Stamp Art Yahoo Group. The challenge was to create a card with only the colors black and turquoise. I love limited color challenges so I signed up and created the card you see below. I stamped the envelope with watermark ink and dusted it with blue-green pigment powder. The subtle sheen changes from blue to green as you move the image in the light.


In a departure from the standard A2 sized cards (4.25 x 5.5 inches) I usually make, I have begun using a smaller 3.5 x 5 inch format which lends itself very well to a quick and informal kind of note. It so happens I have a box of blank cards waiting for embellishment so when the mood strikes me, I just grab one or more and I can start crafting. The other two cards on this page were the result of these creative urges. In both cases I used items from my stash of supplies that been seldom used in the past so I'm starting to rediscover the treasures hiding in my drawers and closets.

My intention is to continue on this creative bent and get back to the level I had reached a few years ago. It was a fulfilling, joyful and magical time for me and I thoroughly enjoyed it. Really now, who wouldn't like a little more joy and magic in their lives? I hope you'll come along for the ride.


Ballo ergo sum
- Gitana, the Creative Diva

Wednesday, July 3, 2013

Summer Is Upon Us Once Again

It happens to me every year. I make no plans to go anywhere or do anything with the hope of actually relaxing around my garden but inevitably my time fills up with all manner of unexpected things, personal and otherwise. At times like this you will notice large gaps in my blog posts. It's been two months since my last post and my garden has gone through quite a few changes since then.

Orange Daylilies
First of all, it rained constantly throughout the month of June, so much so that we came close to breaking the record for the rainiest June in NYC history. As a result, my garden, indeed the entire city of New York, is green and blooming. I'm overjoyed that I haven't had to drag out my hose once this year so far and my garden is growing like gangbusters.


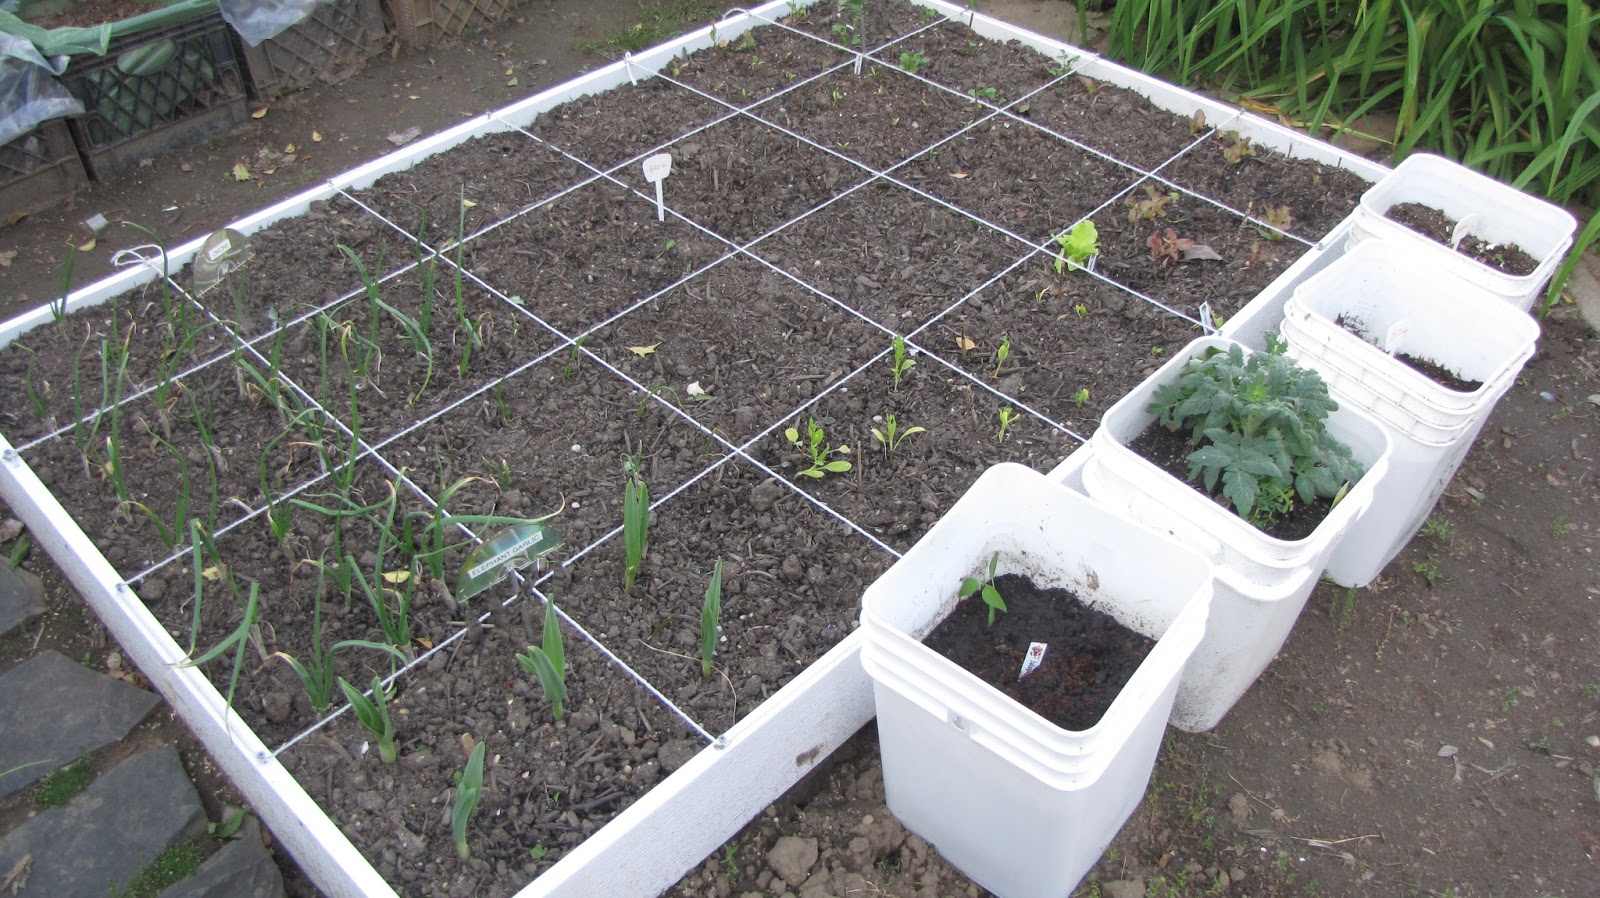
In an earlier post, I had just started building a raised garden, something I had been wanting to do for some time. It is well underway now and boasts crops of onion, garlic, cilantro, lettuce, basil and marigolds. (I'll have to provide more updated photos soon. These were taken weeks ago.) In addition, I built a trellis for my climbers like cucumbers and beans. The trellis frame is constructed of 1/2" schedule 40 PVC pipe and connectors (available at any good home center store) and covered on one side with standard chickenwire (harder to find but not impossible).
The biggest challenge I have faced with the raised bed so far is my neighbors cat who seems to think that my crop of basil is the perfect litter box. The next challenge will come once the rains abate and the summer sun reigns supreme. Lettuce and cilantro don't tolerate heat well so I have erected a tunnel frame over the bed that I will cover with shade cloth to reduce the heat on my delicate veggies. I'm also planning on putting some of the leftover chicken wire from my trellis project around the bed. I'm hoping once the bed is fully protected, this will deter the cat from using my patch as his personal toilet.
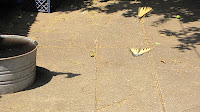
Tiger Swallowtail butterflies.
Dwarf apples.
In other news, my flowers are magnificent, my apple trees are fruiting well and I'm still blessed to be visited by some of Nature's most beautiful creatures as they pass through on their way to parts unknown. Last week I saw a pair of beautiful Tiger Swallowtail butterflies chasing each other around my backyard. I was fortunate enough that they hung around long enough for me to grab my camera and snap a hasty shot of them before they flitted away. To see more pictures of my garden as it has progressed this year, check out  my Photobucket slide show here. As I add photos to the Photobucket album, this slideshow will keep updating with the new images. I'm seriously hoping to be able to get back to my crafts table soon and start creating some cards. It's been so long since I've made any that I'm wondering if I've lost my touch. We shall soon see. As always, I'll be taking photos and posting them here and on my Facebook fan page, Gitana the Creative Diva Enjoy. Ballo ergo sum - Gitana, the Creative Diva

Sunday, May 5, 2013

Another Mother's Day Card

(Click on photo to view a larger image.)

Okay, now I really want to crow. I have managed to create two Mother's Day cards ahead of schedule. For me, that's nothing short of amazing. My inspiration for this card was a notification from one of my Yahoo groups that the weekly layout challenge was due. I haven't participated in a challenge in quite a while but I decided to give this one a whirl and, as is my custom, get more bang for my creative buck by making the card do double duty. Not only do I fulfill the challenge requirements, I have completed a card I needed to make anyway. An Asian theme and a rubber stamped image were among the requirements for this particular challenge so I pulled out all the stops. My last post featured a card I made for my mother. This card is for my sister. It just so happens that my sister loves Asian design also so this card was a no brainer.  

The layout challenge for this week was a criss-cross  pocket card. You can see a tutorial for this layout here. I used a different Asian themed origami paper on the two front pocket flaps and fabric paper on the back of the card. For the inner pull out card I chose translucent vellum so that the pattern of the paper could be seen through it. After stamping and embossing the central image of the woman, I used my Cuttlebug and an oval die to cut it out. Also cut out the larger black oval layer and edged it with gold paint. The belly band is a one inch length of cardstock wrapped around and adhered into place with sticky tape. Gold bamboo and Asian coin stickers are added to the belly band and the central oval is adhered into place using double stick dimensional foam to make it stand off the page. Stazon solvent ink is used to stamp the sentiment on the vellum. Once dry, solvent inks will not smear on non-porous paper such as vellum. A goldtone eyelet and tassel are added to the top to provide a pull for the card. Gold flower stickers add a final touch.


Ballo ergo sum
- Gitana, the Creative Diva

Thursday, May 2, 2013

Ahead of Schedule

I'm one of those people who always underestimates the amount of time it will take me to complete a craft project so I tend to put it off until the last moment. This invariably leads to either a) a sleepless night trying to complete something that should have been started days earlier, or b) an unstarted/unfinished/ unsatisfactory project that won't be ready in time. That's happened more often than I want to admit.

This year I took the bulls by the horns and actually sat down to make a Mother's Day card a week ahead of need. In order to make the process go a little faster, almost all the elements I used, with the exception of the green leaves, were things I already had on hand.

Materials:
  • Card base -- DCWV Mariposa Box of Cards collection
  • Flowers -- Petaloo
  • Black swirl rubber stamp -- Hero Arts Florentine Scroll Background 
  • Sentiment Stamp -- Impress Rubber Stamps
  • Ink -- Tsukineko Versafine Onyx Black (sentiment and scroll),  Versamark Watermark Ink (scroll), Ranger Distress Ink (shading around oval and leaves)
  • Three-part butterfly (solid contour, black veining and body) -- Memory Box dies
Notes:
  • The solid blue butterfly contour was colored using pigment inks and gel pens before the black veined wing details were attached. The body was encrusted with self-adhesive rhinestones. 
  • I designed the leaves in a drawing program and cut them with the eCraft electronic cutter. 
  • Florentine Scroll stamp was inked first with watermark ink then with onyx black ink. Image was then embossed with black ultrafine embossing powder. Because of the "dimples" in the card's texture, the impression looks somewhat distressed and antiqued.
It just so happens that one of the Yahoo groups I belong to is sponsoring a giveaway drawing to celebrate National Scrapbooking Day. The requirement for entries is that it must contain one or more elements created on an electronic cutter using MTC software. Well, the leaves on this card were created in precisely that manner so I entered my card into the drawing. Hey, who knows? 


Ballo ergo sum
- Gitana, the Creative Diva